
The following exercise is to show the power of shortcuts.
The result will be a greyscale representation of the green channel in your image.
- Ctrl L - opens Levels dialog
- Ctrl 1 - selects red channel
Change manually output from 255 to zero.
- Ctrl 3 - selects blue channel
same as above, output to zero
- Shift Ctrl U - Remove color
- Shift Ctrl L - auto levels
There you are. This works also in 16 bits.
Explanation: with the levels adjustment, you turn off the red and blue channel, leaving green.
Then you desaturate and the auto levels distributes the tones in the full black to white range.
If you are not convinced, add a green solid fill adjustment layer in multiply mode: you get your green channel back. Of course, you can use Graffi's or Hiddenelements tools to do just that, but knowing the shortcuts may be very helpful!
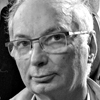
The result will be a greyscale representation of the green channel in your image.
- Ctrl L - opens Levels dialog
- Ctrl 1 - selects red channel
Change manually output from 255 to zero.
- niv.jpg (50.88 KiB) Viewed 1995 times
- Ctrl 3 - selects blue channel
same as above, output to zero
- Shift Ctrl U - Remove color
- Shift Ctrl L - auto levels
There you are. This works also in 16 bits.
Explanation: with the levels adjustment, you turn off the red and blue channel, leaving green.
Then you desaturate and the auto levels distributes the tones in the full black to white range.
If you are not convinced, add a green solid fill adjustment layer in multiply mode: you get your green channel back. Of course, you can use Graffi's or Hiddenelements tools to do just that, but knowing the shortcuts may be very helpful!

